Drop Down MenusCSS Drop Down MenuPure CSS Dropdown Menu

Tuesday, February 26, 2013

GLUTEN FREE ÉCLAIRS AND GLUTEN FREE EGGNOG ÉCLAIRS with DAIRY FREE INSTRUCTIONS


By Bryna Bear aka Gluten Free Baking Bear

     Homemade fresh éclairs are so much better than any bakery ones I ever tasted (except in France).  I had the idea for eggnog filling as a way to use leftover eggnog from the holidays.  The regular pastry cream is delicious and the eggnog cream is wonderfully different and just as good as (or better than – in some people’s opinion) the regular cream.  I thought that a nutmeg vanilla glaze would go better with the eggnog filling than a chocolate one, but I was wrong, they are both really good.  
     Although I had not had an éclair in five years, I did not get a hankering for one until recently.  Well, actually, I probably wanted one before this, but I thought it would take a really long time to make them.  As I found out, it does not take much longer than baking a cake. 
     I was a little afraid to try making the pastry or pâte à choux, since I never made this before.  It was so much easier than I imagined.
The first batch that I made with butter came out perfectly.  For the second attempt I used half olive oil and half Earth Balance non-hydrogenated margarine.  Even though I made a few mistakes in technique these also came out great. (I did not remember as well as I thought from the previous week and did not review the directions before making them again...won’t do that again.)  The pastry recipe is very forgiving.
     Both the dairy and non-dairy pastry creams were flavorful and delicious.  The two eggnog cream fillings were indistinguishable from each other, but with the two regular creams I could taste a difference. The richness and flavor of the butter and milk in the pastry cream is to die for.  I could also tell a little difference between the two pastries.  The butter recipe was, for me, a little more wonderful…there is just something about the taste of butter that I love.   According to my friends who eat wheat, both pastry batches were identical to a wheat version.
     I froze the few leftover ones.  They were really good after thawing at room temperature for a half hour, though not as perfectly crisp as when they were fresh the first day.  The pâte à choux tends to get soggy, so it is best to fill the pastry just before serving.
     Now that I have made this recipe twice, I will definitely make it again if I get a craving for an éclair.


GLUTEN FREE ÉCLAIRS AND
GLUTEN FREE EGGNOG ÉCLAIRS

PASTRY CREAM
See the recipe and instructions for the Pastry Cream on my Banana Cream Pie post.
EGGNOG PASTRY CREAM
Ingredients
Please note that there are differing amounts of ingredients depending upon the type of eggnog used.  I found that the non-dairy eggnog I used tasted sweeter than the regular eggnog and it also had a stronger nutmeg flavor so less sugar and less nutmeg was needed.  Taste the Eggnog you are using and adjust the sugar and nutmeg to your taste.  To be safe, you can make the pastry cream recipe without the sugar and nutmeg and then add the sugar and nutmeg to taste at the end.
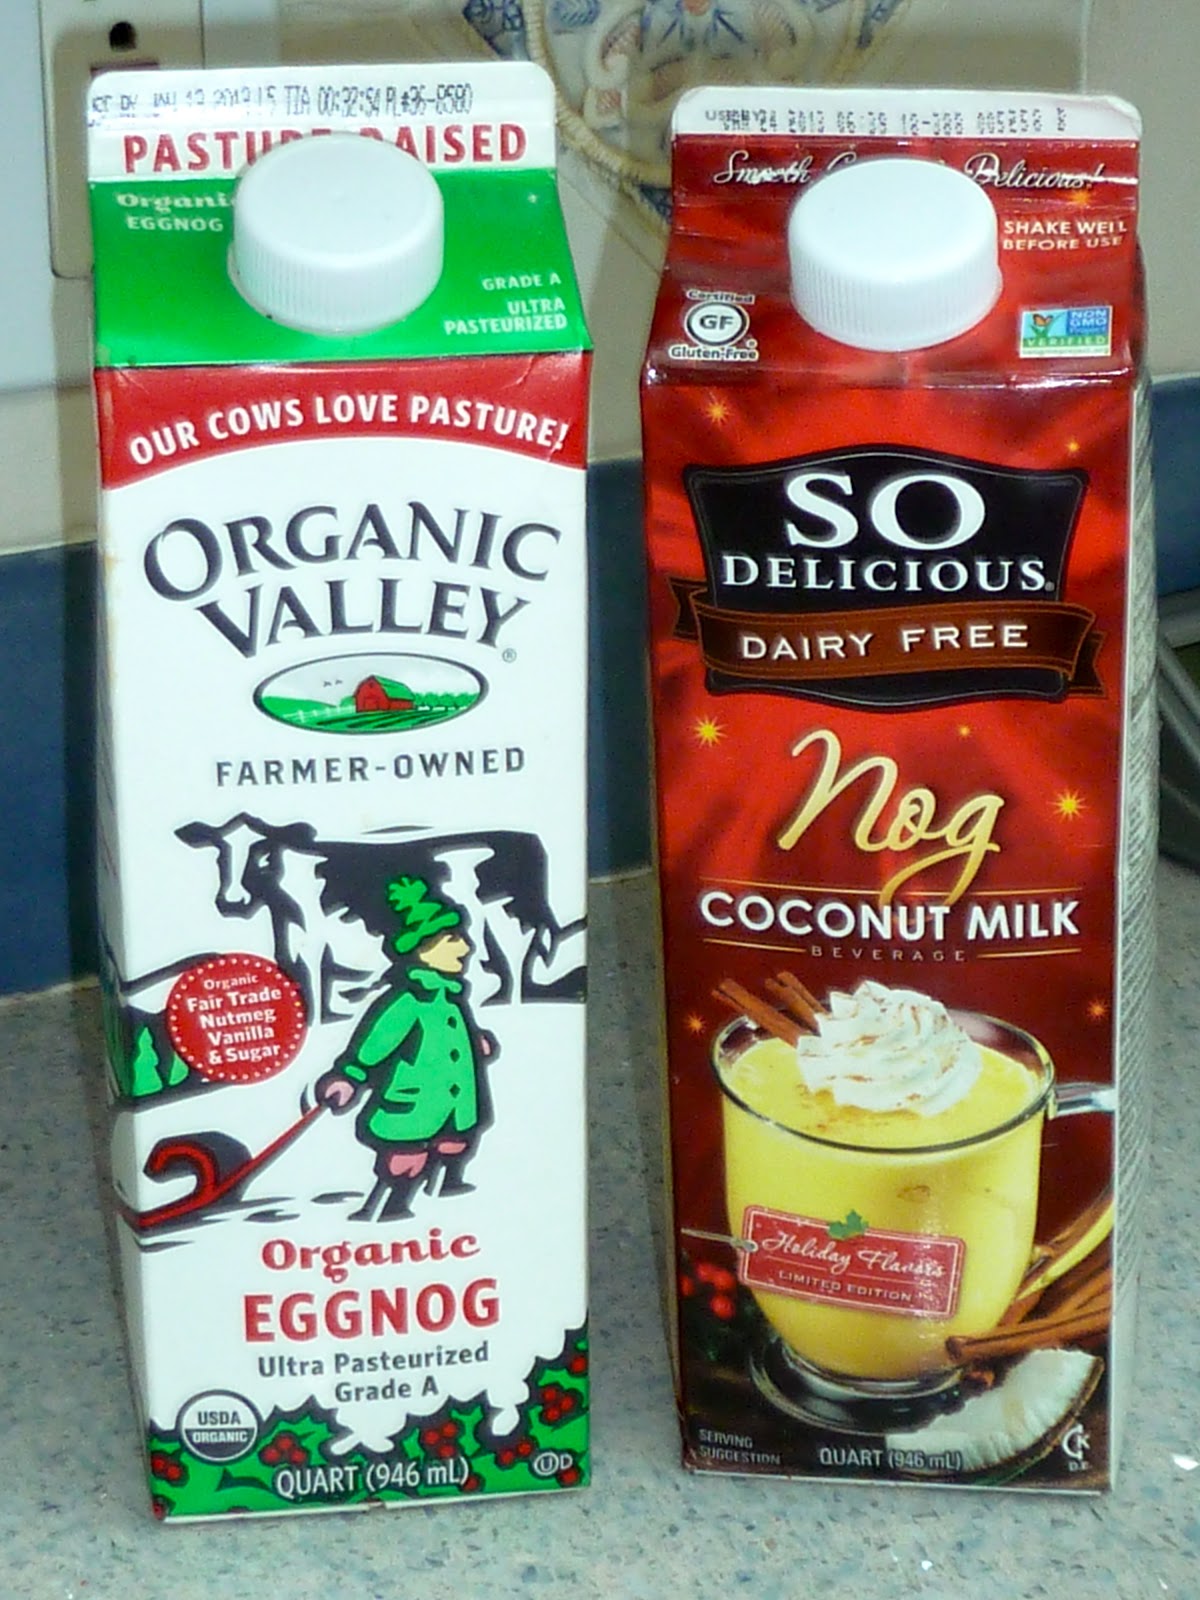
These are the brands of eggnog I used.
The Coconut milk nog is really delicious and
is a satisfying substitute for regular eggnog.
2 cups
Eggnog or Dairy-Free Eggnog - divided
3
Egg Yolks
4 Tbs.
Sugar or to taste – for Dairy-Free use 2 Tbs. sugar or to taste.
5 Tbs.
Cornstarch
3 Tbs.
Butter – for Dairy Free use 1 Tbs. Olive Oil or non-dairy Margarine
½ tsp.
Vanilla
½ tsp.
Freshly ground Nutmeg or to taste – for Dairy Free use ¼ tsp. or to taste.

Directions
     In a bowl mix the egg yolks, cornstarch and ½ cup of the eggnog (or non-dairy eggnog).  Set aside.
     In a saucepan heat the rest of the eggnog and the sugar (OR you can wait until the pastry cream is done and then add the sugar to taste) over moderate heat.  Bring the mixture to a boil.
     Add about ¼ cup of the hot milk to the egg mixture and whisk in well.  Continue to add ¼ cup of eggnog at a time to the egg mixture until about 1 cup in total is added.  This is to temper the eggs.  If you add the hot milk all at once you will have scrambled eggs.
     All at once add the tempered egg mixture to the hot eggnog in the saucepan.  Stir and cook over moderate heat until the pastry cream comes to a boil and begins to thicken.  It will continue to get thicker as it cools.  Remove the pan from the heat.
     Stir in the butter or margarine/oil and vanilla.  At this point you can adjust or add the sugar and nutmeg to taste.
     Pour the hot mixture out onto a large baking sheet with a rim and allow to cool completely.  You can speed up the cooling process by placing the pan in the refrigerator.


PASTRY or Pâte à Choux
Ingredients
1 cup
Water
½ cup
Unsalted Butter – for Dairy-free use non-hydrogenated dairy-free margarine (I used ¼ cup Earth Balance Buttery sticks & ¼ cup olive oil) or olive oil or canola oil or a combination of half oil and half margarine.
1 tsp.
Sugar (I used evaporated cane juice crystals)
½ tsp.
Sea Salt
½ cup
Sorghum Flour
½ cup
Tapioca Flour
¼ cup
Chickpea Flour
½ tsp.
Xanthan or Guar Gum
4 large
Eggs
1 large
Egg white – if needed

Directions
     Preheat oven to 425 degrees.  Place oven racks in upper and lower thirds of oven.
     Line baking sheets with silpat or parchment paper.
     In a bowl mix flours and xanthan or guar gum until well combined.
     In a saucepan heat water, butter or margarine/oil, salt and sugar.  Bring to a boil and remove immediately from the heat.
     All at once add the flours and mix in with a wooden spoon until well combined.
Flour mixture being mixed into the butter/water mixture.
     Return the pan to the stove and cook over medium high heat, stirring constantly, until the dough forms a ball,  pulls away from the sides of the pan and a thin film is formed on the bottom of the pan.  This will take less than three minutes.  Remove from the heat.
Cooked mixture forming a film on the bottom of the pan
and pulling away from the sides of the pan and forming a ball.
     Place the dough in the bowl of an electric stand mixer and beat on low to cool it down, about a minute.
Adding eggs into the dough, one at a time and mixing well
after each egg is added.
     Add eggs, one at a time.  Mix in each egg on medium speed until it is well incorporated into the dough.  When done, the dough should form a peak when pinched between your fingers.  The dough should also be smooth and shiny.  If a soft peak does not form add a little of the egg white and mix in.  Add more egg white a little at a time and mixing well after each addition until the dough forms a soft peak.
Dough with all the eggs added, smooth and able to form a peak on the spoon.
     Place the dough in a pastry bag fitted with a ½-inch wide plain tip.  Pipe out lines of dough 3 ½ inches long and 1 ½ inches apart.  The dough will double in size, so be sure to leave space between each line and along the pan edges.  Use wet fingers to smooth out the tops.
Raw pastry dough on silpat lined baking sheets.
     Bake in the oven at 425 degrees for 10 minutes.  Then turn down the oven to 350 degrees.  Bake an additional 25-30 minutes or until the pastries are golden brown.  Cool completely on a wire rack. 
Baked pastry dough.

CHOCOLATE GLAZE
I used leftover glaze from my Chocolate Cake recipe.  The following is a recipe for éclair glaze from Food Network.
Ingredients
4 oz.
Semi-Sweet Chocolate Chips – for Dairy-Free use dairy-free chips
½ cup
Heavy Cream – for Dairy-Free use non-dairy creamer or non-dairy milk

Directions
     Heat cream/non-dairy cream in a small saucepan.  Remove from heat.  Add the chocolate chips.  Allow to sit for about a minute and then stir until smooth.

NUTMEG VANILLA GLAZE
Ingredients
1 cup
Confectioners sugar
¼ tsp.
Freshly Ground Nutmeg (or to taste)
½ tsp.
Vanilla Extract
1 Tbs.
Water or Milk or Dairy-Free Milk

Directions
      Mix all the ingredients until smooth.  Add more water if too thick.  Add more sugar if too thin.  If you want it to be less sweet replace some of the sugar in the recipe with cornstarch.

Nutmeg glaze on top.
PUTTING IT ALL TOGETHER
MAKING THE ÉCLAIR
     Put pastry cream into a pastry bag or a plastic storage bag.  Cut an opening about ½ inch wide. 
     Slice each pastry in half and then pipe a line of pastry cream (regular or eggnog) onto the bottom half.
     Dip the top of each top half of the pastry into the chocolate or nutmeg glaze. Then put the dipped pastry top, chocolate side up, on top of the cream filled bottom half.
     Arrange éclairs on a tray and allow the glaze to set by chilling them in the refrigerator for about an hour.
     Enjoy!
Eclairs, Dairy on Left
Non-Dairy on RIght
The round one was an experiment, it tasted just as good as the long ones.

-->


Monday, February 18, 2013

GLUTEN FREE CRANBERRY UPSIDE DOWN CAKE with DAIRY-FREE INSTRUCTIONS


By Bryna Bear aka Gluten Free Baking Bear

     I had lots of leftover cranberries from Thanksgiving.  I washed them, placed them in a plastic bag and froze them.  I decided to make something with them so I went looking on-line for a recipe.  A photo of Cranberry Duff caught my eye.  I read the recipe and was a little afraid to try it since there was such a small amount of batter and I was in the mood for a real piece of cake.  The Duff was on the Martha Stewart site and there was also a beautiful photo of Cranberry Upside down Cake.  What I liked about the Duff was the nuts, so I decided to use the Duff topping with the Upside Down Cake bottom.  Of course, I converted the regular recipe into gluten free first.
     This cake is moist and very flavorful.  Though cranberries are tart, the sugar is just sweet enough to balance the tartness of the berries.  The cooked cranberries had a texture and taste like the dried sweetened cranberries you find in stores, only plump and moist.  I love nuts and I enjoyed the taste and texture of them on the cake.
     This cake is easier than many and looks so pretty.  No leftovers of this cake made it to the freezer.  I will definitely make this again.


GLUTEN FREE CRANBERRY UPSIDE DOWN CAKE

Ingredients
Topping
1 ½ cups
Cranberries – Fresh or Frozen
1/3 cup
Pecans – Toasted and coarsely chopped (I didn’t toast the nuts and they were good this way, maybe toasting would be better…I’ll see next time.)
1/3 cup
Sugar – I used Evaporated cane juice (for topping)
½ tsp.
Cinnamon
2 Tbs.
Unsalted Butter – to grease pan

Cake
6 Tbs.
Unsalted Butter – for Dairy-Free use dairy-free non hydrogenated margarine such as Earth Balance Buttery Sticks
½ cup
Sugar - I used Evaporated cane juice
1
Egg
1 tsp.
Vanilla Extract
¾ cup
Sorghum Flour
¼ cup
Tapioca Flour
¼ cup
Chickpea Flour
¾ tsp.
Xanthan or Guar Gum
2 tsp.
Baking Powder
¼ tsp.
Sea Salt
½ cup
Milk – Dairy free use non-dairy milk such as soy or almond

Directions
Preheat oven to 350 degrees.
Grease an 8-inch round pan with 2 Tbs. of butter or margarine.
     Mix the 1/3 cup sugar, pecans and cinnamon.  Pour half onto the bottom of the pan.  Arrange the cranberries into one layer on top of the sugar mixture.  Pour the rest of the sugar/nut mixture evenly on top of the berries.  Set aside.
Cranberries with sugar/nut mixture on bottom of pan.
     In a bowl or in the bowl of an electric mixer add ½ cup sugar and 6 Tbs. butter or margarine.  Cream until light and fluffy.
     Add the egg and vanilla and mix until well combined.
     In a separate bowl add the flours, salt, xanthan or guar gum and baking powder.  Mix well with a whisk.
     Add 1/3 of the flour mixture to the egg mixture and mix in well, then add 1/3 of the milk and mix well.  Repeat until all the ingredients are well combined.
Batter when finished.
     Spoon the batter over the layer of cranberries and sugar/nut mixture. Smooth the batter with a wet hand.
Batter on top of cranberries.
 Batter was smoothed out with wet hands.
     Bake for 30-35 minutes or until done.  Cake is done when a cake tester or wooden toothpick comes out clean or when the cake springs back when the center of the cake is pressed lightly with a finger.
     Place the hot pan on a rack to cool.  Wait 20 minutes then run a knife around the edge of the cake to loosen it.  Then invert onto a rimmed platter or cake dish.
-->

Here are some products and brands I like to use:
      

Tuesday, February 12, 2013

GLUTEN FREE PEAR CLAFOUTI RECIPE - with DAIRY FREE INSTRUCTIONS


By Bryna Bear aka Gluten Free Baking Bear

     Clafouti is a French dessert that is a cross between a pudding and a pancake in texture.  It is easy to make and quite delicious.  I bought some perfectly ripe pears at a great price and wanted to use them quickly.  I saw this recipe on-line one day and wrote it down. I could not find it again, so I really do not know where the recipe is from originally.  It was a regular flour recipe that I converted to GF.  You can also use other fruit such as cherries, peaches, apples, plums, blueberries, etc. to make this dessert. 


GLUTEN FREE PEAR CLAFOUTI

Ingredients
¼ cup
Unsalted Butter – melted  (for Dairy-Free use oil)
¾ cup
Milk – (for Dairy-Free use non-dairy milk of choice)
3
Large Eggs
2 tsp.
Vanilla
¼ tsp.
Sea Salt
1/3 cup
Sugar
1/2 cup
GF Flour – I used: 4 Tbs. Sorghum Flour, 2 Tbs. Tapioca Flour and 2 Tbs. Chickpea Flour
½ tsp.
Xanthan or Guar Gum
3
Ripe Pears – Peeled, cut in half and cored.

Directions
     Preheat oven to 350 degrees.
     Grease a 9-inch round glass pie dish with butter or margarine.
     In a bowl add flours, salt, sugar and xanthan gum.  Mix well.
     In a separate bowl mix the milk, eggs vanilla and melted butter and mix well.
Pears peeled, cored, halved and one sliced crosswise.
     Peel, half and core pears.  Slice each pear crosswise into ¼-inch slices.  Keep the sliced pear halves together.  Carefully move each cut pear half onto the prepared glass dish.  Arrange with the large end towards the outside and the narrow end of the pear towards the center of the dish.  Press the pears so that the slices fan out slightly and make a pretty presentation.
Sliced pears arranged in the baking dish.
     Add the liquid mixture to the bowl with the flour mixture and blend with a whisk until well combined.  The batter will be thin.
Pears with batter over them.
     Pour the batter over the pears in the glass dish.  Place on a baking sheet and put in the center of the preheated oven.
     Bake 35-40 minutes until golden brown and set.  Serve warm or at room temperature.

-->

Here are some brands and products I use and like:

Monday, February 4, 2013

GLUTEN FREE SHRIMP AND GRITS – SOUTHERN TEA PARTY RECIPES CONTINUED


By Bryna Bear aka Gluten Free Baking Bear

     This recipe was a big hit at the Southern Tea Party.  The creamy, buttery grits with garlicky shrimp were shear heaven.  I served them in individual portion sized cups to make a delicate presentation and to make serving easy and neat.
     Grits are a typical southern food made from corn meal.  There are many different grinds of cornmeal for grits.  I used medium grind cornmeal. If you can find some cornmeal called grits, use them, but not the instant kind.  Stone ground cornmeal consists of the grain and the chaff.  If using stone ground cornmeal the chaff will have to be skimmed off the top while cooking or the raw cornmeal can be cleaned before it is cooked.  The raw stone ground cornmeal is placed in a pot.  The pot is filled with water, and the cornmeal is stirred.  Then, when the chaff floats to the top, it is skimmed off.
     In the South, grits are often served at breakfast with eggs, much like we serve eggs with home fried potatoes up North.  Shrimp and grits is also a typical Southern food.  Sometimes grits are made with cheese (as are many foods down South). 
     I went to North Carolina a few years ago and was surprised by cheese many times.  I mean that it turned up in foods that it never would have occurred to me contained cheese.  I ordered eggs with toast and home fries and there was cheese on the eggs, on the home fries and in the toasted bread.  My shrimp scampi came covered in so much melted cheese that I could not tell what was underneath, and the menu description mentioned not a word about cheese being served with the scampi.  I have returned to North Carolina several times since that first visit, and cheese ambushes have been plentiful.  I enjoy cheese with many foods, but not grits (or eggs over easy or ice cream).
     I did not follow any recipe for the shrimp.  I just made them how I like them with lots and lots of garlic.  I do not enjoy very spicy foods, so I did not add cayenne pepper, but you can add this if you like.


GLUTEN FREE SHRIMP AND CREAMY GRITS

GRITS
Ingredients
2 cups
Water
2 cups
Milk
1 cup
Grits (I used medium grind cornmeal)
To taste
Salt
¼ cup
Heavy Cream
2 Tbs.
Unsalted Butter

Directions
     Bring the water and milk to a boil.  Add the grits a little at a time while stirring constantly.  Cook until the grits are soft to the bite, stirring frequently.  This will take about 20 minutes. 
     Stone ground grits may take up to an hour to cook.  Add more water if needed until the grits are done.
     When done the grits should be thick and smooth.
     Remove from the heat and stir in the cream and butter. 

SHRIMP
Ingredients
1 lb.
Raw Shrimp
1 whole bulb
Fresh Garlic – separate the individual cloves and peel and cut off the ends
To taste
Salt and Pepper
1 tsp.
Lemon Juice – freshly squeezed
3 Tbs.
Olive Oil
2 Tbs.
Unsalted Butter
2 Tbs.
Fresh Parsley – coarsely chopped

Directions
     Slice garlic paper-thin or crush with a garlic press.
     Heat a large pan over a medium high flame.
     Add olive oil and, when hot, add the garlic.  Stir constantly until lightly cooked and then add the shrimp, all at once.
     Stir the shrimp until it is well coated with the garlic.  Add salt and pepper and stir until the shrimp is just cooked.
     Add the lemon juice and the butter and mix until the butter melts.
     Serve over the Creamy Grits.
     Garnish with chopped parsley.  Serve warm. 

-->