Drop Down MenusCSS Drop Down MenuPure CSS Dropdown Menu

Sunday, December 23, 2012

VEGAN GLUTEN FREE PUERTO RICAN PASTELES RECIPE


Posted by Bryna Bear aka Gluten Free Baking Bear

     I am posting this recipe as a service to those who want to eat traditional Puerto Rican holiday food but are now vegetarian and also to help those who cook for them.
     Pasteles are a root plant paste with a meat filling that is wrapped in plantain leaves or paper, tied and boiled.  They are like Mexican tamales using different root vegetables instead of corn to make the paste. These pasteles are made by substituting tofu (gasp) for meat in a traditional pastel recipe. 
     My family (just including my siblings and me and our children and spouses) is one big American melting pot. We are a mix of Russian/Latvian Jewish, Puerto Rican, Hungarian, German, Thai, Japanese, Swedish and Jamaican cultures and traditions.  We celebrate Chanukah, Christmas, Passover and Easter.  Our holiday meals include foods from all different countries.  We all love to eat.
      As with many interfaith and cultural marriages, ours has evolved over the years and we have formed our own traditions.  At this time of year we celebrate Chanukah with Latkes, rugelach and Menorah lighting.  We also celebrate Christmas with Christmas trees and a typical Puerto Rican holiday dinner of pernil al horno, pastels, arroz con gondules, maduros and flan. 
     Our son has been vegan for over five years now and I have learned to adjust all the family holiday meals to make sure that he is well fed (I assume that feeding our children well– no matter what age – is the desire of all mothers of every culture).
     Making pasteles is time consuming and takes some practice to form and tie them well.  In the old days it was a family project that took hours of peeling and hand grating to form the masa (paste), now a days it is much faster and easier using a food processor.
     My two favorite Puerto Rican cookbooks are Puerto Rican Cuisine in America by Oswald Rivera and Puerto Rican Cookery by Carmen Aboy Valldejuli.  Rivera’s recipes are very down home and Valldejuli’s recipes are more gourmet.  This recipe is based on the pastel recipe from Rivera’s cookbook.


VEGAN PASTELES

Ingredients
Tofu Filling
3 Tbs.
Olive Oil
1 pkg.
Firm Tofu – cut into bite sized cubes
½ cup
Pimento stuffed Green Spanish Olives
¼ cup
Capers
1 8-oz. can
Tomato Sauce – I use Goya Spanish Style
½ cup
Roasted Red Peppers from a jar – chopped
1 16-oz. can
Chick Peas
½ cup
Raisins
½ cup
Olive Oil
To taste
Sea Salt and Pepper
½ cup
Water
1
Unsalted Vegetable Bouillon Cube
½ tsp.
Summer Savory (optional – this herb prevents gas from beans and also adds a nice subtle flavor to foods)

Paste/Masa
10
Green Banana (guineas)
1 lb.
Yautia – peeled and cut into pieces that will fit into a food processor feeding tube.
1 lb.
Pumpkin (calabasa) – peeled, seeded and cut into chunks
2 large
Potatoes – peeled and cut into large pieces
2 large
Green Plantains
2 cups
Vegetable Oil – I use canola oil
1 cup
Annatto Seeds
1 Tbs.
Salt
24
Plantain leaves or Pastele Papers
12
Pieces of kitchen twine cut into 3-ft. pieces
½ - 1 cup
Soy  or rice or other non-dairy milk (may or may not be needed depending upon the moistness of the vegetables)


Directions
Achiote oil - annatto seeds heated in oil.
     To make the achiote (annatto oil), place the cup of annatto seeds and two cups of oil in a saucepan and heat over a low flame.  Stir until the oil is a uniform red color.  Do not over heat the oil; once it is warm it takes less than five minutes to get the right color.  Remove from the heat and let the achiote cool.  Pour the cooled mixture through a strainer into a bowl or pot.  I find that one 5 ounce container of annatto seeds works fine, even though it is a tad under 1 cup.  A word of caution if you have never worked with annatto seeds before.  This seed is a natural food coloring and it will stain your clothes, wood tables, plastic sink mats, etc.  Be sure to wear an apron and to use care when working with it.  I cover the table with a plastic lined disposable tablecloth to protect the table and make clean up easier.  This whole pastel making process is a bit messy.
     To make the filling, heat 3 tablespoons of olive oil in a large pot.  Sauté cubed pieces of tofu for 1-2 minutes. 
Tofu cut into cubes sauteing in oil.
     Add olives, capers (I don’t like them whole, but I love the taste so I mince them up before adding to the pot.), tomato sauce and chopped roasted peppers. Cook over low heat for about 5 minutes, stirring occasionally.
     Next add the chickpeas, raisins, ½ cup olive oil, summer savory (if using), water and vegetable cube.  Cover and cook over medium heat for 15 minutes.  Season with salt and pepper to taste.  Turn off the heat and let it cool while you make the paste/masa.
Tofu filling all cooked.
     To make the paste or masa, wash and peel all the plantains, bananas, yautia, potatoes and pumpkin.  Peeling plantains and green bananas turns your hands a bit black, so use gloves if you want your nails to stay clean looking.  I cut off the ends and cut a slit in the skin and then run my fingers along the slit between the banana and the skin in order to peel it. 
     Use the grating wheel of the food processor first to grate all the vegetables into smaller pieces before blending them into a paste with the regular processor blade.  The yautia is especially hard to blend into a paste if you do not make it into smaller pieces first.
All the root vegetables, plantains and bananas grated by the food processor.
     Once the vegetables go through the grating wheel.  Switch the food processor blade to the usual one and then add ¼ of the grated vegetables to the processor bowl.  Process until smooth.  Add a few tablespoons of soymilk to moisten the mixture if it is not getting smooth.  Repeat this process until all the vegetables are ground into a smooth paste. 
The vegetables, bananas and plantains made into a smooth paste in the food processor.
Some soy milk was added to moisten and help make the paste/masa smoother.
     Add the salt and ½ cup of the achiote/annatto oil mixture that has been cooled and strained.  Mix well.
Adding achiote to the paste/masa.
     Gather all you will need on your workspace.  Place your bowl of masa/paste, the pot of tofu filling, the bowl or pot of achiote, plantain leaves or papers and pieces of string on the table.  You will need a tablespoon for the achiote/annatto oil, a large spoon for the filling and one large spoon for the masa/paste.
A bowl of masa (paste), a pot of achiote, a pot of tofu filling, a roll of pastel papers and string cut into 3-foot pieces.
     If using plantain leaves, you must treat them first by wiping them with a damp cloth and then heating them over an open flame on the stove.  Use a moderate flame.  Tongs work well to hold the leaves.  Turn them and heat them, but be sure not to burn the leaves.
     I use pastel papers because in New Jersey I have never seen plantain leaves and I rarely get to Brooklyn where one can actually find some.
     Pastel papers are the same as parchment paper, cut into 12-inch by 18-inch pieces.  The papers are sold by weight in Spanish food markets.
     To assemble the pastel place a leaf or paper on the table.  Spread a tablespoonful of the achiote around the center of the paper.  The oil prevents the cooked pastel from sticking to the paper or leaf, so that you can remove the cooked pastel and eat it.
Spreding achiote onto the center of the pastele paper.
     Spread about 2 tablespoons of masa/paste into a rectangle shape on top of the achiote. 
     Put about 2 tablespoons of the tofu filling on top of the paste.  The goal is to have some of the tofu filling in each bite of the pastel when you eat it.
Achiote spread on the paper with some masa on top spread into a rectangle.
Some tofu filling in top of the paste.
     Fold the paper in half length-wise.
Paper with paste and filling on it folded in half lengthwise.
Edge of the paper folded to make a lip.
     Fold the edge of the paper to make a lip.  And then fold once more.  This double folded lip of paper will keep the contents of the pastel from leaking out when you boil them. 
Paper with fillings folded in half again length wise.
     Push the filling toward the center and fold the paper in half again.
     Fold a double lip on the edge of one of the sides and fold this side over the filling. 
Folding the first side over the pastel.
     Fold a double lip on the edge of the other end of the pastel and push the filling towards the center as you hold the first folded end in place.  Fold the second edge over the first one.  Turn the pastel over to keep the edges in place and form another pastel.
Pushing the filling towards one side while
 lifting the other side to fold over the pastel.
     Place 2 pasteles together with the folded edges facing each other. 
The pastel with both sides of the paper folded over the center.
     Take a string and fold it in half, form a horseshoe shaped middle and spread the string ends apart.  Place the two pasteles on top of the string.
One pastel on top of the other with the folded sides facing each other
on top of the folded string.
     Thread the ends of the string through the horseshoe bend part of the folded string.  Pull the ends to tighten the string around the pasteles.
Pulling string ends through the loop of the folded string.
     Separate the strings and pull in opposite directions towards the sides of the pasteles package. 
String ends beginning to be pulled to each side of the pastele.
     Wrap the strings around to the bottom side of the pasteles.  Flip the package over and tie a knot.
Package flipped over and ready for the knot to be tightly tied.
Pasteles package tied with a knot.
     I make tofu and regular pasteles.  I use two different kinds of string to indicate what type of filling is inside.  The thicker twine is for the tofu ones and the thin string for the pork ones.  I used both strings to indicate a third type of pastel.  One guest this year cannot eat potatoes so I formed some tofu pasteles and tied them with thick and thin strings before adding the potatoes to the rest of the masa/paste and forming the rest of the tofu and pork pasteles.
     Repeat the pastel making process until all the filling and paste are used.  This recipe makes about 24 pasteles.
     I always make them ahead, as this process is way too time consuming and messy to do on Christmas morning.  I place the pasteles in plastic bags and freeze them until I am ready to cook them.
Pasteles in pot after boiling for an hour.
     To cook pasteles, boil water in a large pot.  Add packets of pasteles so that they fit with some extra room and are covered with water.  I can usually fit 4 packets in one large pot.  Boil, uncovered, for 1 hour.
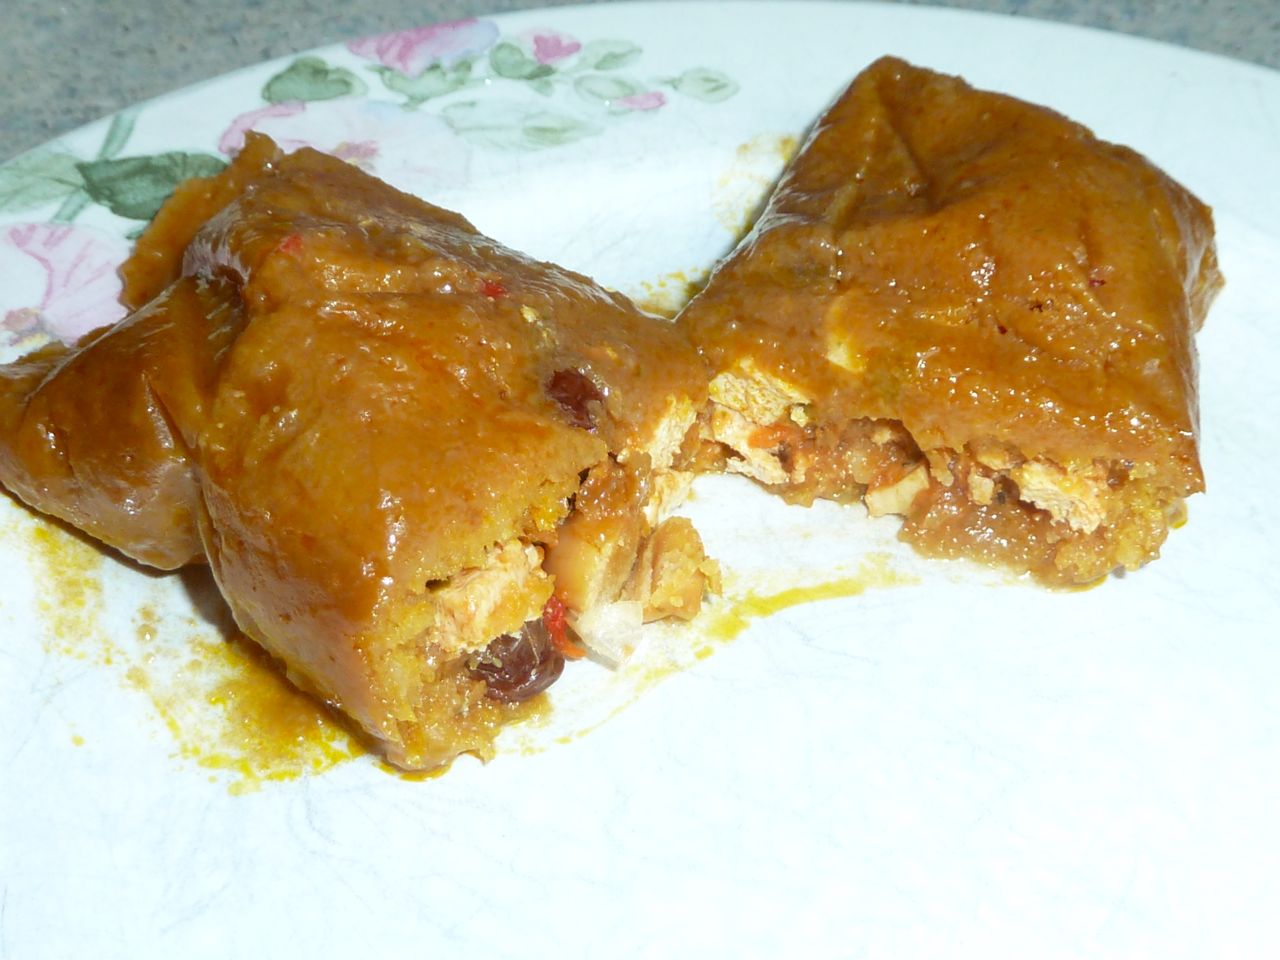
     To serve, cut the string and open the paper.  Turn the pastele out onto a serving platter.  If it sticks a little use a knife-edge to help it off of the paper. 
     Serve with rice and pigeon peas, arroz con gondules.  I make the rice without any meat for vegans.
Pastel with rice and kidney beans.


-->


Monday, December 17, 2012

GLUTEN FREE CHOCOLATE PEANUT BUTTER SURPRISE COOKIE RECIPE WITH A VEGAN/DAIRY FREE VERSION & A GLUTEN FREE VEGAN MARZIPAN CANDY RECIPE


Posted by Bryna Bear aka Gluten Free Baking Bear

     These cookies are crisp on the outside and creamy on the inside.  There is peanut butter in the cookie dough as well as the filling, but it looks like a plain chocolate cookie. I love peanut butter so the peanut butter filling would come as a pleasant surprise for me.  Use caution if you know anyone with a nut allergy or distaste for peanut butter, as the cookie would then have to be called peanut butter shock and eewww.
     As with most GF cookie dough this one is softer than the wheat version.  In this case the extra moistness makes it easier to cover the peanut butter filling completely.  I remember making these years ago, before I had to go GF and it was difficult to wrap the dough around the filling without ending up with some filling showing after they baked.
     This recipe was one I found in a magazine many years ago.  It was called Magic Peanut Butter Middles.  The vegan/dairy free version is nearly undistinguishable from the butter and eggs one, as both the chocolate and peanut butter are strong flavors that hide any butter or margarine taste.
     I realize that in Europe peanut butter is not used or liked much.  Here in the States we can’t get enough of the stuff and put it in everything you can imagine, especially baked goods.
     The marzipan recipe was a happy accident.  I wanted to make an almond filling for the rugelach I made last week.  When I followed the recipe for the almond filling in The Joy of Cooking it came out very watery and did not look at all like what I expected.  I guess I’m used to seeing almond filling from a can. 
     I decided to change gears and make marzipan out of the almond paste failure. I added more confectioners sugar and cornstarch until I got a dough the consistency of the marzipan I usually buy. I also added some almond extract for that typical marzipan candy flavor.  I formed shapes and dipped some of the candy in chocolate. 
     Much of the store made marzipan contains wheat from glucose syrup and or egg whites.  This recipe tastes just as good as any I ever bought and none was ever fresher in the store.  With a food processor it takes very little time or effort to make a batch.  Shaping the marzipan does take a bit of time.


GF CHOCOLATE PEANUT BUTTER SURPRISE COOKIES

Ingredients
Cookie Dough
1 cup
Sorghum Flour
¼ cup
Chickpea Flour
¼ cup
Tapioca Flour
½ tsp.
Xanthan or Guar Gum
½ cup
Unsweetened Cocoa Powder
¾ tsp.
Baking Soda
Pinch
Sea Salt (omit if peanut butter is salted)
½ cup
Sugar
½ cup
Brown Sugar-packed
¼ cup
Peanut Butter - Smooth (I use the one that has nothing but peanuts in it - no salt; no sugar; no oils or fats added.)
½ cup
Butter – For Vegan/Dairy-Free use non-hydrogenated, non-dairy Margarine
1 tsp.
Vanilla
1
Egg – For Vegans use ¼ cup water instead of an egg.

Filling
¾ cup plus 2 Tbs.
Peanut Butter - Smooth
¾ cup
Confectioner’s sugar – sifted before measuring

Directions
     In a small bowl combine the flours, xanthan or guar gum, cocoa powder, baking soda and salt.  Mix with a whisk and set aside.
     In a large bowl mix sugar, butter or margarine and ¼ cup peanut butter until light and fluffy.
     Add vanilla and egg or water and mix until well combined.
     Stir in flour mixture and blend well.  Set aside.
     In a small bowl combine the filling ingredients and mix well.  Use a 1-inch diameter scoop to measure out dough into 30 pieces.  Roll each piece into a ball and place on a sheet of waxed paper.  For 60 smaller cookies divide each scooped out piece of filling into two parts before rolling each piece into a ball.
Cookie dough (left) & filling dough (right)
scooped out onto wax paper.
     Using a scoop that measures 1 ½ inch in diameter measure out the chocolate dough into 30 pieces and roll each piece into a ball.  For 60 smaller cookies divide each piece in half before rolling the dough. Place the dough balls on to a piece of waxed paper.
Flattened cookie dough with filling ball in center.
Cookie dough gathered around filling ball
and pinched together so no filling is exposed.
Ball rolled smooth after dough is completely around filling.
     To form the cookies, first flatten the chocolate dough ball with the palm of you hand and then place a ball of the peanut butter filling in the center of the flattened circle of dough.  Pick the dough disk up and fold the chocolate dough around the peanut butter ball, gather the dough at the top and pinch to seal the dough completely over the peanut butter center.  Roll this large ball until smooth and place back on the wax paper.  Repeat until all the dough and filling are used.
     When ready to bake cookies preheat the oven to 375 degrees.
     Line baking sheets with silpat or parchment paper. 
     Place the dough balls on the prepared baking sheets, 2 inches apart for small and 4 inches apart for larger cookies.
Balls of dough encased filling, 2 inches apart on wax paper.
The balls are covered with a piece of plastic wrap so that
the glass will not stick to the dough when pressed flat.
     Cover the balls with plastic wrap and use a glass to press down each ball into a flattened disk.  When the balls are all flattened, remove the plastic wrap and bake.
Cookie pressed flat directly on top of silpat liner.
     Bake cookies for 7-10 minutes.  The cookies will harden as they cool.
     Store completely cooled cookies in a cookie tin lined with wax paper or in an airtight plastic container.
     Unbaked dough disks can be frozen for later use.
     Makes 60 large 3-4 inch cookies or 60 smaller 2” cookies.


GLUTEN FREE VEGAN MARZIPAN

Ingredients
Marzipan Dough
8 ounces
Blanched Almonds
½ cup
Water
1 ½ cups
Confectioner’s sugar – sifted before measuring
½ - 1 tsp.
Almond extract (to taste)
About ½ -1 cup
Corn starch
Chocolate Coating
1 ½ cups
Vegan Chocolate Chips
2 Tbs.
Vegetable Shortening (non-hydrogenated)

Directions
     Place almonds, water and sugar in the bowl of a food processor and run until a smooth dough is formed. 
     If the almond mixture is too thin and wet you can add cornstarch to thicken it.  You can add confectioner’s sugar, but it will make the dough sweeter.  Add cornstarch and/or powdered sugar a little at a time until the mixture is firm and pliable yet still a little moist.
Marzipan dough rolled flat and cut into shapes with cookie cutters.
     Form the dough into shapes.  I rolled out the dough and cut it with cookie cutters.  You can shape it with your hands into fruit, vegetables, animals or any other shape and decorate the pieces with food coloring. 
Keep dough covered so that it does not dry out.
     To cover the pieces with chocolate melt 1 ½ cups vegan chocolate chips and 2 Tbs. non-hydrogenated shortening in the top of a double boiler that is over hot water.  Stir until smooth.  Dip each piece of marzipan, one at a time, into the chocolate.  Shake off the excess chocolate and place the pieces on wax paper to cool and set. 
Chocolate dipped marzipan on wax paper
 waiting until the chocolate sets and gets hard.
     Store the marzipan pieces in an airtight container. 
I dipped some pieces half way.     

-->


Monday, December 10, 2012

GLUTEN FREE RUGELACH WITH VEGAN/DAIRY FREE VERSIONS


Posted by Bryna Bear aka Gluten Free Baking Bear

     I love rugelach.  These cookies are tender, rich and delicious.  I made two GF batches, a regular and a Vegan/Dairy Free one for Chanukah on Saturday. I prefer the taste of the butter ones, but both batches were very yummy. 
     The recipe, by Lee Abrams of Tottenville, is one that I cut out from the Staten Island Advance, a newspaper. I have been making this recipe for over 20 years. This rugelach recipe is less complicated than most and not too sweet. 
     The gluten free version is a bit more difficult to make than the regular one.  The dough is softer and a little tricky to handle.  I find that it works best to roll the dough out between two pieces of waxed paper or plastic wrap and then put the rolled out disk of dough onto a baking sheet and freeze it until firm.  By the time you put the jam and other toppings onto the frozen dough disk it is just soft enough to cut and roll.  Then it requires a second freezing of the formed cookies before baking to help to keep the cookies’ shape. I used Spectrum brand “Butter” flavored non-hydrogenated shortening for the Vegan/DF cookies.  These cookies came out a bit flatter than the butter ones.  Next time I may use half Spectrum shortening and half Earth Balance margarine to help to keep the shape better.
Vegan Rugelach
     I don’t try for perfectly shaped cookies since they taste great no matter how they look once they are baked.  If you want them perfectly uniform take care to cut the circle of dough into evenly divided parts.
     I do not like to add more flour than the recipe calls for in order to make a stiffer dough.  The extra flour changes the texture of the cookie and usually makes the final product a bit tougher than I would prefer.


GLUTEN FREE RUGELACH

Ingredients
DOUGH
½ pound (2 sticks)
Unsalted Butter
For Vegan/Dairy Free use non-hydrogenated Margarine or Shortening or a combination of the two.
8 ounces
Cream Cheese
For Vegan/DF use non-dairy cream cheese.
1 cup
Sorghum Flour
½ cup
Chickpea Flour
½ cup
Tapioca Flour
½ tsp.
Xanthan or Guar Gum

FILLING
¼ cup
Sugar
1 tsp.
Cinnamon
1 cup
Walnuts – finely chopped
1 cup
Raisins or Chocolate Chips
1 10 ounce jar
Preserves – apricot or raspberry (fruit juice sweetened) Or you can use almond paste.

Directions
     Combine butter or margarine and cream cheese and blend well.  Add the flours and xanthan or guar gum and mix well.
Dough being rolled out between two pieces of wax paper.
     Divide the dough into four pieces. Roll out each piece of dough between two pieces of waxed paper or plastic wrap.  Roll the dough into a 12-inch circle.  Place the rolled out circles, still between the waxed paper or plastic wrap, on top of each other on a baking sheet.  Place the baking sheet with the dough disks into the freezer until the dough is hard.
     Remove one dough disk from the freezer and place on a counter or cutting board.  Peel off the waxed paper or plastic wrap from one side and put it right back down on top of the dough.  Flip the dough and wrap over and remove the other sheet of waxed paper or plastic wrap and set aside.  The first disk of dough I worked with I only peeled off the top piece of wrap and the dough stuck too much on the bottom.  Removing the wrap from the bottom and them replacing it before flipping it over worked much better.
Dough disk spread with apricot jam, cinnamon, sugar, walnuts and raisins.
     Spread 2-3 tablespoons full of jam of choice, or almond paste, onto the circle of dough.  Leave a 1-inch border of dough at the edge.
     Next sprinkle the sugar cinnamon mixture over the jam or almond paste circle.  Then sprinkle with the chopped nuts.  Lastly, sprinkle with the raisins or chocolate chips, if desired.
     All of my disks were sprinkled with cinnamon, sugar and walnuts.  I varied the four disks by using apricot jam on two, making one with raisins and one plain.  I made the other two disks with raspberry jam and used chocolate chips with one and the other without. You can use whatever jam or filling you wish.
Dough disk with raspberry jam, cinnamon, sugar, walnuts and chocolate chips.
Cut into 16 slices with a pizza cutter.  One cookie rolled up, one in the middle of being rolled.
Looks like a pizza doesn't it?
     Cut each circle of dough into 12-16 slices (depending upon the size you prefer) using a pastry or pizza cutter or a knife.
     Starting at the wide end of each slice roll the dough towards the point.  Repeat with each slice until done. 
     Place the formed cookies onto a baking sheet lined with waxed paper and return to the freezer until hard.
Raw rugelach on a waxed paper lined baking sheet
 ready to go into the freezer to get firm.
     You can store the formed frozen cookies in a plastic bag until ready to bake.
     Repeat this process with each dough disk.
     When ready to bake the cookies, preheat the oven to 375 degrees.
     Arrange the rugelach 2 inches apart on a silpat or parchment paper lined baking sheet. 
     Bake for 20-25 minutes.
Baked rugelach cooling on a baking sheet.
     Makes 48 cookies (if each dough disk is cut into 12 pieces).
     Makes 64 smaller cookies (if each dough disk is cut into 16 pieces).
     

-->